Customizing an Arch ARM image using QEMU
Alexander Rüedlinger - - ARM , QEMU , Tools , chroot , Arch Linux
A really nice tool to customize disk images for ARM-based single board computers, like the Raspberry Pi, is QEMU. QEMU advertises itself as a generic and open source machine emulator and virtualizer [1, 2]. In other words, QEMU can run operating systems and programs made for different architectures, like ARM, on a developer's x86-64 development machine.
This is why QEMU is an ideal tool in combination with chroot [2,3] to customize Arch Linux ARM images for ARM-based devices, such as the RPi. So once we have an ARM image, we can simply chroot into the root filesystem and install extra software packages, like vim, zsh or avahi. In brief, chroot is an operation that allows a user on a Unix-like operating system to change the root directory of the current running process and its children [2]. Basically, this allows one to run commands within a different root filesystem environment also known as a chroot jail.
On most GNU/Linux distributions these handy tools can be easily installed via the package management. The rest of this blog post provides instructions how we can customize an existing Arch Linux ARM image on an Arch-based system. As described in my last blog post, these images can be created with basic Linux/CLI knowledge.
Preparation
Basically, we just need to install three packages, including qemu,
qemu-arch-extra, update-binfmts, so we can emulate an ARM root filesystem
on a x86-64 host system:
pacman -S qemu qemu-arch-extra
Lastly, we need to install update-binfmts from the AUR:
git clone https://aur.archlinux.org/binfmt-support
cd binfmt-support
makepkg -si
The package binftm-support contains a helper script to easily register and
unregister binary formats with the kernel using the
binfrm_misc module. In brief, this
module provides the Linux kernel on host system to recognize arbitrary executable
file formats and to pass them to certain user space applications [5].
update-binfmts --enable qemu-arm
With the help of the command update-binfmts --display we can double check if
the binfmt entry for ARM was successfully registered:
update-binfmts --display | grep -w 'qemu-arm'
qemu-arm (enabled):
interpreter = /usr/bin/qemu-arm-static
Mount the image
In this step, it's assumed that we have already created an Arch Linux image. These images can be created with basic Linux/CLI knowledge as described in this blog post.
First, we need to mount the root filesystem of the image. This can be done with
the help of the command losetup:
losetup -f image.img
Second, we need to find out the corresponding loopback device for the image:
losetup -a
/dev/loop0: []: (/media/data/xander/src/archlinux-arm/raspberry-pi2/image.img)
In my case this is the loop device loop0. Now, we need to reload the partition
table of the device loop0 so the partitions are known to the host OS.
partprobe /dev/loop0
To double check that the OS knows the partition table of the device loop0, we
can use the command lsblk, which is used to list block devices:
 lsblk /dev/loop0
NAME      MAJ:MIN RM  SIZE RO TYPE MOUNTPOINT
loop0       7:0    0    1G  0 loop
├─loop0p1 259:0    0  100M  0 loop
└─loop0p2 259:1    0  923M  0 loop
As one can see, both partitions of the image are known to our host OS.
Chroot into the root filesystem
In this last step, we chroot into the root filesystem of the Arch Linux ARM image.
First, we create a directory called arm-chroot in /mnt/ on the host system:
mkdir /mnt/arm-chroot
Now, we can mount root filesystem under the path /mnt/arm-chroot:
mount /dev/loop0p2 /mnt/arm-chroot
However, before we can chroot into the root filesystem, it is necessary to copy
the qemu-arm-static binary to /mnt/arm-chroot/usr/bin. Thanks to this binary,
it is possible to execute non-native target executables just as native
exeutables once we are in the chroot jail.
For copying the qemu-arm-static binary, we can run the following command:
cp $(which qemu-arm-static) /mnt/arm-chroot/usr/bin
Moreover, it's a good idea to copy temporarily a working resolv.conf file from
your host system to the image's root filesystem, so you have a working DNS
resolution once you chroot into it:
mv /mnt/arm-chroot/etc/resolv.conf /mnt/arm-chroot/etc/resolv.conf.bak
cp /etc/resolv.conf /mnt/arm-chroot/etc/resolv.conf
As a last step before we can run chroot, we need to mount the necessary device
files so we have a working chroot environment where we can install software via
pacman. In short, we need to mount sys, proc, and dev:
mount --bind /proc /mnt/arm-chroot/proc
mount --bind /sys /mnt/arm-chroot/sys
mount --bind /dev /mnt/arm-chroot/dev
mount --bind /dev/pts /mnt/arm-chroot/dev/pts
Finally, we are ready to chroot into the root filesystem:
chroot /mnt/arm-chroot /bin/bash
Customizing the image
Now that we are in the chroot environment, we can customize the image to our liking. But before we do that, we should upgrade the system and double check if we have a working package mirror list:
pacman -Syu
Useful development tools
In case you intend to compile and develop some Arch Linux ARM packages, you should definitely install the following packges:
pacman -S base-devel git vim zsh sudo wget
Hostname
Changing the hostname is just a matter of editing the files /etc/hostname and
/etc/hosts.
echo chaotix > /etc/hostname
In case of the hosts file we should add an extra line like the
one below. For example, I decided to use the hostname chaotix:
127.0.1.1 chaotix.localdomain chaotix
Create a new user
A default user on a new Arch Linux ARM system is the user alarm. If you like to create a new user you can do that as follows:
useradd -m -s /bin/zsh xander
passwd xander
As you can see, my new user is called xander and uses the awesome zsh shell :-).
Setup sudo
I often use sudo instead of a root account to administer my Linux systems,
so I added my user account to the group wheel:
gpasswd -a xander wheel
To complete the sudo configuration, we must not forget to uncomment
the first line starting with #%wheel in /etc/sudoers.
In other words, remove the Hashbang # before %wheel.
Also note that you should use visudo to edit the sudoers file.
Delete default user
And if you're like me and don't need the existing alarm user,
you can simply remove the user from the image:
userdel -r alarm
Root password
Lastly, we should change the default root password of the Arch Linux ARM image:
passwd
Avahi
In order to make the single board computer discoverable on the home network, we can install avahi and mdns. Overall, the installation procedure is the same as described on the Arch Linux Wiki [6].
pacman -S avahi nss-mdns
Once installed, we should adapt the /etc/nsswitch.conf so the hostname
resolution using the .local naming scheme works:
hosts: ... mdns_minimal [NOTFOUND=return] resolve [!UNAVAIL=return] dns ...
And finally, to enable the avahi service on every boot, we can run the following
systemctl command:
systemctl enable avahi-daemon.service
Leave the chroot and unmount things
Once you made all the customization, leave the chroot, unmount the root
filesystem of the image, and detach the loop device /dev/loop0:
exit
umount -R /mnt/arm-chroot
losetup -d /dev/loop0
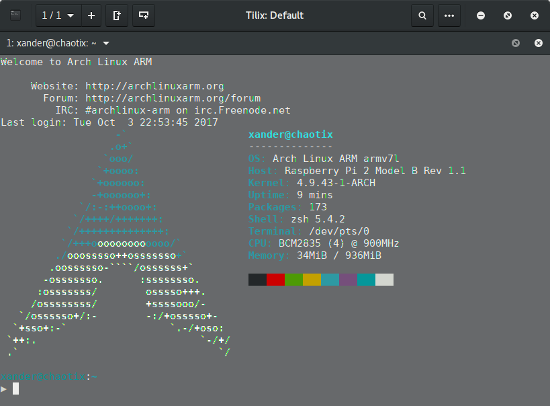
Talk is cheap, show me something!
It's testing time. So let's test the customized image on real RPi2 hardware!